When it comes to finding the best glue for wood crafts, there are several options to consider. For small wood projects or craft sticks, PVA glue is often a reliable choice due to its strong bond and ease of use.
For more substantial wood projects or outdoor applications, epoxy glue or Gorilla glue can provide the durability needed. Remember to apply proper clamping techniques for the best results with any woodworking glue.
Finding the Best Glue for Wood Crafts
When it comes to crafting with wood, choosing the right glue is essential for strong and lasting bonds. Among the top choices are Gorilla Wood Glue and Titebond Wood Glue, known for their strength and reliability in woodworking projects.
For repairing furniture like a broken chair leg, Gorilla 6206005 Wood Glue proves its effectiveness. Remember to sand glued joints for smooth finishes and consider drying time for efficient work.
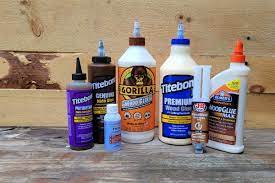
If you’re looking to create a wood craft, finding the right glue can be tricky. Different types of glue are better suited for different types of materials and projects. For wood crafts, it’s important to choose the right type of glue so that your project will last. Let’s take a look at some of the best glues for wood crafts and how to use them.
1. Polyurethane Glue (Gorilla Glue)
This type of glue is one of the most popular options for wood crafts. It forms an incredibly strong bond and is great for heavy-duty projects like furniture repair or other items that need extra durability. It’s also water resistant, making it ideal for outdoor projects.
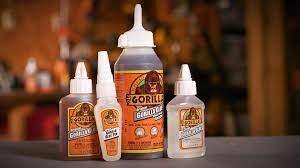
Polyurethane glue works best if you apply it on both surfaces and then press them together firmly until they are completely dry.
2. Carpenter’s/Wood Glue
Finding the Best Glue for Wood Crafts This type of glue is designed specifically for woodworking projects, such as framing or building wooden furniture pieces. It creates a strong bond between two pieces of wood, and it won’t break down whenever moisture is present (unlike regular white glue).
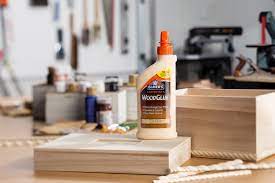
Carpenter’s/wood glue typically needs to be clamped together while drying to ensure a strong bond between the two pieces of wood.
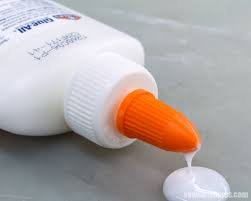
3. White Glue (PVA)
This type of glue is a classic when it comes to crafting with children–it washes off easily with soap and water, so there’s no need to worry about any messes! White glue has its limitations though–it isn’t very durable or waterproof, so it should only be used for small crafts or quick repairs that don’t require much strength. The best way to use this type of glue is by applying it thickly on both surfaces before pressing them together firmly until dry.
No matter what kind of woodcraft you’re working on, choosing the right type of glue can make all the difference in terms of strength and durability. Polyurethane glues like Gorilla Glue are great for heavy-duty projects that require extra durability; carpenter’s/wood glues work well when creating wooden furniture; while white glues are perfect when crafting with kids because they wash off easily with soap and water. With these tips in mind, you’ll have no trouble finding the right kind of glue for your next project!
What type of Glue should I use for Wood Crafts?
For wood crafts, the best type of glue to use depends on what type of craft you are creating and how permanent the hold needs to be. For projects that require a strong, waterproof bond, polyurethane glues (like Gorilla Glue) are a great choice. They work great for repairs around the house such as furniture breaks, cabinets, or wooden frames. This type of glue has superior strength, sands easily, and can be used in damp environments like bathrooms and kitchens.
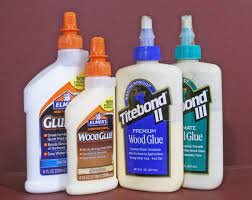
If you need something with more flexibility than polyurethane glue provides you could use carpenters’ wood glue which is an economical solution for joinery or simple crafts with basic strength requirements. It can also be stained when dry and it bonds better when clamped together during assembly.
For arty wood crafts like decorative boxes or intricate projects where precision is important, epoxy putty may be your best bet as it’s easier to work with and won’t drip while still providing good adhesion capabilities along with dust-free curing time which makes sanding a snap afterward! Another plus – there’s no clamping required here either!
If you choose to go with any adhesive for your project make sure that it’s specially designed for the wood so that you get the optimal result from your application – this means avoiding generic multi-purpose adhesives designed for metal or plastic since they aren’t going to provide enough hold on wood surfaces alone.
When it comes to creating wood crafts, there are several types of glue you can use. The type of glue you choose will depend on the project and your desired outcome. For general projects such as furniture repair or basic craft construction, a good option is white glue (or PVA glue). White glue is inexpensive and easy to use – just squeeze some out onto the surfaces that need gluing together and press them together firmly. It dries quickly, forming a strong bond between the pieces of wood.
For projects where more strength is required, hide glue may be a better choice. Hide glues are often used for musical instruments or furniture construction since they form stronger bonds than white glues due to their longer curing time. To use hide glue properly, it’s best heated up until liquid before applying with an old paintbrush or clean cloth piece directly onto the wood surface being glued together – this increases its strength by making sure all parts are completely coated in adhesive before pressing together firmly and allowing it to cool down naturally until cured.
For outdoor applications such as wooden fences or trellises-type structures which must withstand exposure to weather conditions like sun rays and rainwater over long periods; epoxy resin might be preferred instead as its excellent adhesion properties make it suitable for outside environments while also offering superior impact resistance compared to other options available in the market today.
Epoxy resin needs to be mixed with hardener at different amount ratios depending on manufacturer specifications before application – then applied evenly across both surfaces needing to be adhered before bonding them carefully into place with pressure clamps if necessary while curing takes place – usually, around 12 hours until fully cured under room temperature conditions but could take much less depending on the type used so check label instructions closely when purchasing either product indoors store shelf or online websites alike!

